When I heard that there would be a regional Fisk-a-teer event  close enough to drive to, I signed up immediately. In fact, I was the first one to sign up. Friday November 7th, my hubby joined me on my trip to the Virginia City Fisk-a-Friendzy 2008. After stopping to get some travel food and look for more orange clothing and accessories, we headed down the road. Our trip from Boise, Idaho took us about 7 hours (not including the ½ hour or so that we drove around lost looking for the right highway out of town).
 We got into Reno about 7:30 pm and were disappointed to find that the first scrapbook store we stopped at was closed. We decided to try one more and found the girls at Treasured Memories having a private crop. They let us in to say “hi” and a few of them were excited to report that they would be there on Saturday, including the sweet owner Kathy. They gave us suggestions for dinner and we were on our way. Contrary to popular belief, although Reno is a gambling town, not everything stays open all night, including the buffets. We finally ate a wonderful, leisurely dinner at Outback Steakhouse and Dennis enjoyed (and shared) his birthday dessert. We stayed at Circus Circus in a very nice quiet room.
 We headed up the mountain to Virginia City early the next morning. When Angela told us it is a winding road she wasn’t kidding. I’m not a fan of heights and the switchbacks and drop offs were a little nerve wracking. The view of the valley was beautiful though. We arrived just in time for everyone to check in. My hubby high-tailed it out of there (too many women, too few men) and I got to work helping Angela set up her prize display. I was shocked at how many prizes Fiskars had donated. I didn’t even try to count them. There was a Rock, Paper, Trimmer; Frankies with ink, Ink by Steph skull scissors, Heidi Grace flower scissors, squeeze punches, paper packs, magazines, swivel craft knife (how do I find one of those cool knives??!!), and so much more. Angela also had tools set out that the ladies could try out. I watched Julie play with Frankie and decided I would love to get one. Wasn’t I surprised when I found out that I won one for my website idea :)
 close enough to drive to, I signed up immediately. In fact, I was the first one to sign up. Friday November 7th, my hubby joined me on my trip to the Virginia City Fisk-a-Friendzy 2008. After stopping to get some travel food and look for more orange clothing and accessories, we headed down the road. Our trip from Boise, Idaho took us about 7 hours (not including the ½ hour or so that we drove around lost looking for the right highway out of town).
 We got into Reno about 7:30 pm and were disappointed to find that the first scrapbook store we stopped at was closed. We decided to try one more and found the girls at Treasured Memories having a private crop. They let us in to say “hi” and a few of them were excited to report that they would be there on Saturday, including the sweet owner Kathy. They gave us suggestions for dinner and we were on our way. Contrary to popular belief, although Reno is a gambling town, not everything stays open all night, including the buffets. We finally ate a wonderful, leisurely dinner at Outback Steakhouse and Dennis enjoyed (and shared) his birthday dessert. We stayed at Circus Circus in a very nice quiet room.
 We headed up the mountain to Virginia City early the next morning. When Angela told us it is a winding road she wasn’t kidding. I’m not a fan of heights and the switchbacks and drop offs were a little nerve wracking. The view of the valley was beautiful though. We arrived just in time for everyone to check in. My hubby high-tailed it out of there (too many women, too few men) and I got to work helping Angela set up her prize display. I was shocked at how many prizes Fiskars had donated. I didn’t even try to count them. There was a Rock, Paper, Trimmer; Frankies with ink, Ink by Steph skull scissors, Heidi Grace flower scissors, squeeze punches, paper packs, magazines, swivel craft knife (how do I find one of those cool knives??!!), and so much more. Angela also had tools set out that the ladies could try out. I watched Julie play with Frankie and decided I would love to get one. Wasn’t I surprised when I found out that I won one for my website idea :)
I only created one card the entire day. I was a little jittery from too much caffeine and Fisk-a-friendziness. It was so great to meet every one and I had fun just walking around talking and helping out when I could. The popcorn, hot cocoa, orange licorice, and chocolate were all delicious. Lunch and dinner were wonderful. My hubby joined us for the shredded barbeque sandwiches at lunch and I asked all 100 ladies to join in singing Happy Birthday. He ran out as quickly as he could enjoying his cute birthday cake (thanks Angela!) and he even let me sleep in the same room that night ;)
 One of the highlights of the day was the train ride. Angela asked me to be ready to film because our cowboy friends were going to “rob” us. I thought Julie was just the unlucky victim of a silly skit and joined in the chants of “hang her.” It wasn’t until I realized that the large box Suzanne was holding had a pair of very large scissors that I knew we had a third Fisk-a-teer of the Year. I couldn’t scream in delight since I was holding the video camera for Angela but I was very excited for Julie. She is so deserving of the award.
 I couldn’t believe how orange everyone was! I had picked up some
 orange sweatpants to go with my orange shirt but orange is not a flattering color on my behind (they will be going back to Wally World). I loved Donna Jean’s orange wig, Totally Tami and Kathi Jo’s cute embroidered sweatsuits, the Fiskar Floozy and the girls with the Fisk-a-crowns. We were a sea of orange! I even borrowed Ms. Jackie’s camera guide and relearned how to use my PowerShot color accent mode. I have some very orange pictures I’ll have to share.
It was so great to see Stephenie and Suzanne again. I know it was a really long flight for both of them but it was great to have them there. I was really sad to find out that Cheryl was too sick to join us but I know she has her own event next weekend. I loved getting to see five other Nifty Fifties. It was like a mini-reunion. I hope Fiskars lets us do it again next year. If they do, I hope we can do it earlier in the year in hopes of avoiding snow. Coming down off the mountain in snow was even more nerve-wracking than the trip up when I could see the drop offs.
 Sunday morning, we headed out early and stopped by Treasured Memories Too on our way out of town. They had really cute gift bags for the Fisk-a-teers and the employee there was really sweet. She helped us look up our driving route on MapQuest and we were on our way.
Once I got home (after another 7 long hours and getting lost trying to find where I95 was in Winnemucca) I happily unpacked my loot and started a thank you card for Fiskars. I used my Leave it to Weaver and Threading Water punches. I stamped it with my new HG Cherrywood Lane stamps; and I embellished it with a flower and button from our make-and-take. I included one of my ATCs that has my Fisk-a-teer picture framed by the Coming Up Roses Border and Corner punch.
Thank you Fiskars for a wonderful weekend full of fun, food, and friends! Can we do it again next year?!


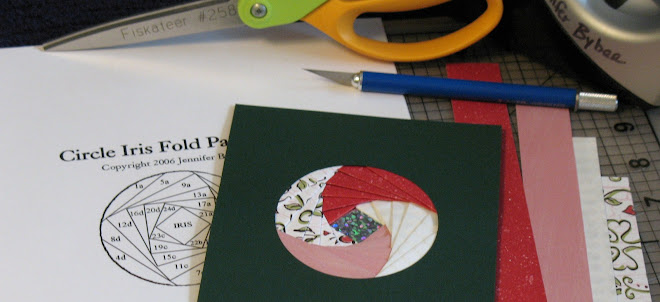
 Recently I taught my 6 year old's 1st grade class how to iris fold. First of all, I have to say it was crazy! We had 19 children and 3 adults. It was a pretty good ratio although I would recommend another adult if I did it again. I really simplified the folding for the kids. I numbered all of their paper strips beforehand. We had enough tape rolls that each pair of students had a roll. The hardest concept for them to grasp was the "edge" of the paper. I don't know how many times I said line up the "edge" of the paper with the lines while pointing to the "edge" and the lines.

.JPG)

.JPG)


.JPG)


.JPG)
.JPG)
.JPG)




.JPG)